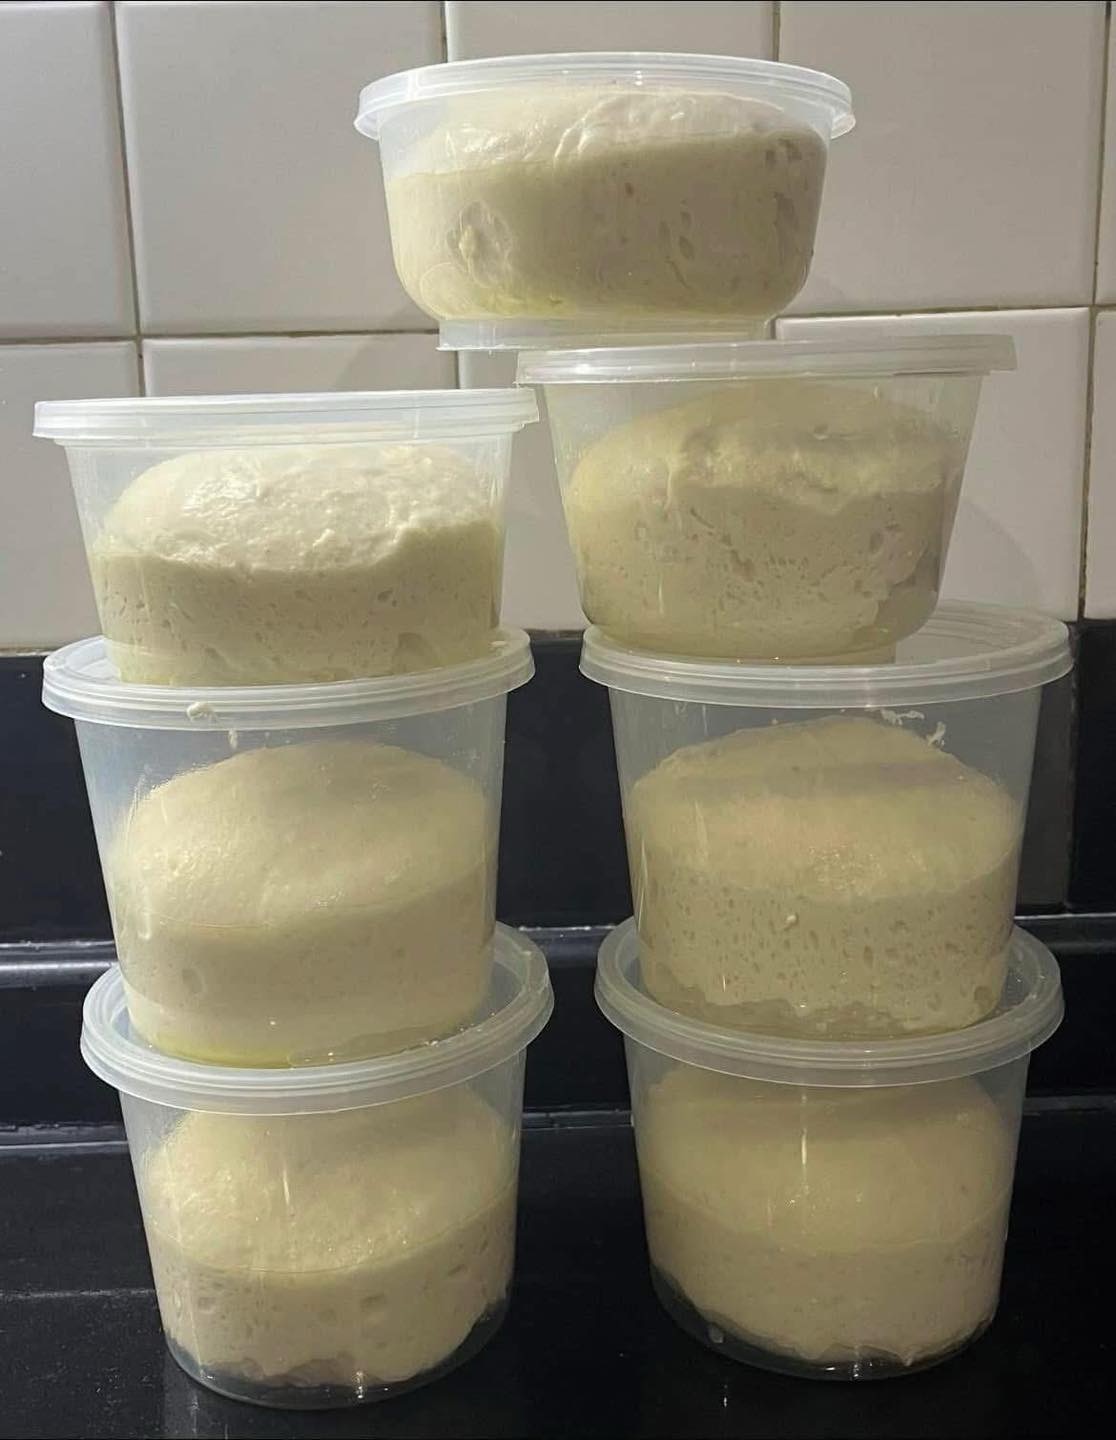
How to Make and Freeze Bim’s Pizza Dough for Perfect Pizzas Anytime
Homemade pizza dough is a game-changer for pizza night, and the ability to freeze it means you’ll always be ready to whip up a delicious, homemade pizza. This detailed guide walks you through Bim’s pizza dough recipe, a versatile dough that freezes beautifully and delivers outstanding results every time. Whether you’re a seasoned baker or just starting out, this method ensures you have perfectly proofed, freezer-ready pizza dough on hand for up to 2 months.
Why Freeze Pizza Dough?
Freezing pizza dough is a convenient way to enjoy fresh, homemade pizza without the hassle of making dough every time. By preparing and freezing the dough ahead of time, you can:
• Save time on busy weeknights.
• Enjoy restaurant-quality pizza at home.
• Reduce food waste by preserving excess dough.
Key Ingredients in Bim’s Pizza Dough
This recipe uses a combination of bread flour, sourdough starter, and pantry staples to create a flavorful, stretchy dough. Here’s what you’ll need:
• 1000 g bread flour: Provides structure and strength for a chewy crust.
• 200 g sourdough starter: Adds a natural, tangy flavor and helps with leavening.
• 750 g water: Ensures the dough is hydrated for elasticity and rise.
• 30 g olive oil: Adds moisture and enhances flavor.
• 30 g lard: Contributes to a softer, tender crust.
• 60 g sugar: Feeds the sourdough starter and enhances browning during baking.
• 20 g salt: Balances flavor and strengthens the dough’s structure.
Step-by-Step Guide to Making and Freezing Pizza Dough
1. Mix the Dough
Combine all the ingredients in a large mixing bowl. Use your hands or a stand mixer with a dough hook attachment to mix until the dough comes together.
2. Perform Stretch and Folds
To develop the gluten, perform 6 sets of stretch-and-folds every 20 minutes. Here’s how:
• Grab one edge of the dough, stretch it upward, and fold it over the rest of the dough.
• Rotate the bowl slightly and repeat until all sides have been stretched and folded.
This process strengthens the dough and creates the ideal structure for pizza crust.
3. Proof the Dough
Cover the dough with a damp cloth or plastic wrap and let it proof at 25°C (77°F) for 2 hours. During this time, the dough will rise and become airy.
4. Divide and Shape the Dough
Once the dough has proofed, divide it into portions weighing 280-300 g each—perfect for individual pizzas. Shape each portion into a smooth, round ball by tucking the edges underneath and rolling it on a lightly floured surface.
5. Prepare for Freezing
• Lightly grease plastic containers with olive oil to prevent the dough from sticking.
• Place each dough ball into a container, cover with a tight-fitting lid, and transfer to the freezer.
How to Use Frozen Pizza Dough
Thawing the Dough
1. Remove the dough from the freezer and place it in the refrigerator 12-24 hours before you plan to use it.
2. Once thawed, bring the dough to room temperature (about 1-2 hours) before shaping and baking.
Shaping and Baking
1. Lightly flour your work surface and roll out the dough into your desired pizza size.
2. Add your favorite toppings, such as tomato sauce, cheese, and fresh vegetables.
3. Bake at 250°C (480°F) or as high as your oven will go for 8-12 minutes, or until the crust is golden and crisp.
Tips for Success
1. Measure Ingredients by Weight: Using a digital scale ensures accuracy, especially with sourdough-based recipes.
2. Don’t Skip Stretch and Folds: This step is essential for gluten development, which gives the dough its characteristic stretch and chewiness.
3. Oil the Containers Well: Brushing the containers with olive oil prevents sticking and makes it easy to remove the dough when thawed.
4. Freeze Quickly: Transfer the dough to the freezer promptly after shaping to preserve its structure.
Why This Recipe Stands Out
• Sourdough Starter: Adds depth of flavor and enhances the dough’s texture.
• Perfect for Freezing: Designed to maintain its quality even after being frozen for weeks.
• Soft Yet Crispy Crust: The combination of olive oil and lard creates a tender, flavorful crust with just the right amount of crispness.
Frequently Asked Questions
1. Can I use instant yeast instead of sourdough starter?
Yes! Replace the sourdough starter with 7 g of instant yeast and adjust the water to 700 g.
2. How long can the dough be frozen?
The dough can be frozen for up to 2 months. Be sure to label the containers with the date for easy tracking.
3. Can I make larger or smaller pizza dough portions?
Absolutely! Adjust the portion size based on your preferred pizza size. Just remember to adjust the baking time accordingly.
Final Thoughts
With this Bim’s pizza dough recipe, you’ll never have to order takeout again. The sourdough starter brings incredible flavor, and the ability to freeze the dough means you can enjoy homemade pizza anytime. Whether it’s a quick weeknight dinner or a fun weekend activity with family, this recipe ensures perfect results every time.
Save this recipe, share it with fellow pizza lovers, and let us know in the comments how your pizzas turned out. Happy baking!
