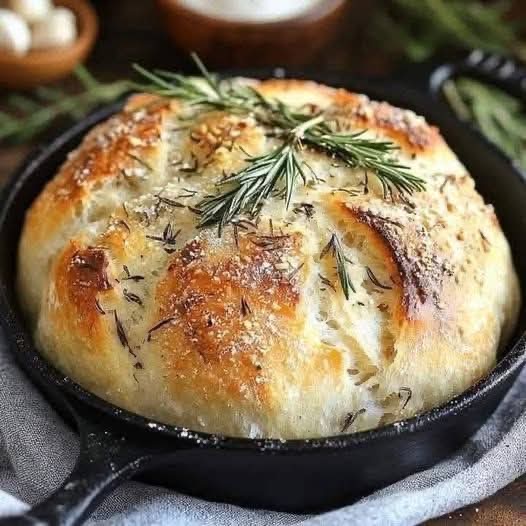
Sure! Here’s a long, SEO-optimized post for Rustic No-Knead Rosemary Garlic Bread that’s ideal for blogs, Pinterest, or social platforms. It includes an enticing intro, background, full recipe, pro tips, variations, and a warm closing to encourage engagement:
Rustic No-Knead Rosemary Garlic Bread 🍞🧄🌿
Crusty outside, pillowy inside—this artisan bread is packed with garlic and rosemary flavor, and requires zero kneading!
❤️ Must-try if you love homemade bread but hate the mess of kneading!
✨ Introduction
There’s something truly magical about pulling a golden, crusty loaf of homemade bread straight from your oven. The crackling crust, the comforting aroma of fresh rosemary and roasted garlic, and the warm, fluffy interior—Rustic No-Knead Rosemary Garlic Bread brings bakery-level satisfaction to your kitchen with almost no effort.
Whether you’re a seasoned baker or a total beginner, this recipe is foolproof and incredibly rewarding. No stand mixer. No complicated techniques. Just mix, wait, and bake!
🌿 Why You’ll Love This Bread
- No kneading – Just mix and let time do the work
- Bold flavor – Garlic and rosemary infuse every bite
- Versatile – Perfect with soups, pasta, or just butter
- Impressive – Rustic artisan look with minimal effort
- Only 5 minutes of hands-on time
🧄 Ingredients
- 3 cups all-purpose flour
- 1 ½ teaspoons salt
- ½ teaspoon active dry yeast
- 1 ½ cups warm water (not hot)
- 3 cloves garlic, minced (or roasted if preferred)
- 2 tablespoons chopped fresh rosemary (or 1 tbsp dried)
- Optional: 1 tablespoon olive oil (for added richness)
- Optional: Extra rosemary and garlic for topping
📝 Instructions
1. Mix the dough (night before preferred)
In a large bowl, combine flour, salt, and yeast. Add in the warm water, garlic, and rosemary. Mix with a wooden spoon or spatula until you get a shaggy, sticky dough. Do not knead.
2. Cover and let rise (12-18 hours)
Cover the bowl with plastic wrap or a clean towel. Let it sit at room temperature overnight or at least 12 hours. The dough should double in size and look bubbly.
3. Shape and rest
Flour your hands and a surface, then gently turn the dough out onto it. Fold it over a couple times into a ball shape. Place it on a sheet of parchment paper and let it rest uncovered for 30-45 minutes.
4. Preheat your oven & pot
While the dough rests, place a Dutch oven (or heavy oven-safe pot with lid) into your oven and preheat to 450°F (230°C) for 30 minutes.
5. Bake the bread
Carefully remove the hot pot from the oven. Lift the dough using the parchment paper and place it into the pot. Cover and bake for 30 minutes. Then uncover and bake another 10–15 minutes until golden and crisp.
6. Cool before slicing
Remove from the pot and let it cool on a wire rack at least 20 minutes before slicing (if you can wait!).
👩🍳 Pro Tips for Success
- Use roasted garlic for a sweeter, mellow flavor.
- Add olives, sun-dried tomatoes, or cheese for variation.
- Let the dough rise in a warm spot like an oven with the light on in cold weather.
- Use bread flour instead of all-purpose for extra chewiness.
- Don’t skip the resting time—this helps develop flavor and structure.
🌾 Variations
- Olive & Herb Bread – Add ½ cup chopped olives and thyme
- Cheddar Jalapeño Bread – Fold in 1 cup shredded cheese + sliced jalapeños
- Whole Wheat – Use half whole wheat and half all-purpose flour
- Lemon Rosemary – Add 1 tsp lemon zest for a citrusy twist
📊 Nutritional Info (approx. per slice)
- Calories: 120
- Carbs: 22g
- Protein: 3g
- Fat: 1.5g
- Sugar: 0g
- Fiber: 1g
💬 Conclusion
This Rustic No-Knead Rosemary Garlic Bread is everything you want in homemade bread—crispy, chewy, aromatic, and wildly simple. Once you make it, you’ll never go back to store-bought!
Whether you’re pairing it with your favorite soup, making bruschetta, or just enjoying a warm slice with butter, this bread delivers on comfort and taste every single time.
🥖 Have You Tried This Bread?
Drop a ❤️ if you love no-knead bread or leave a comment if you tried it! Save this recipe for your next cozy weekend bake!
Let me know if you’d like a Pinterest graphic or Instagram carousel captions too!
