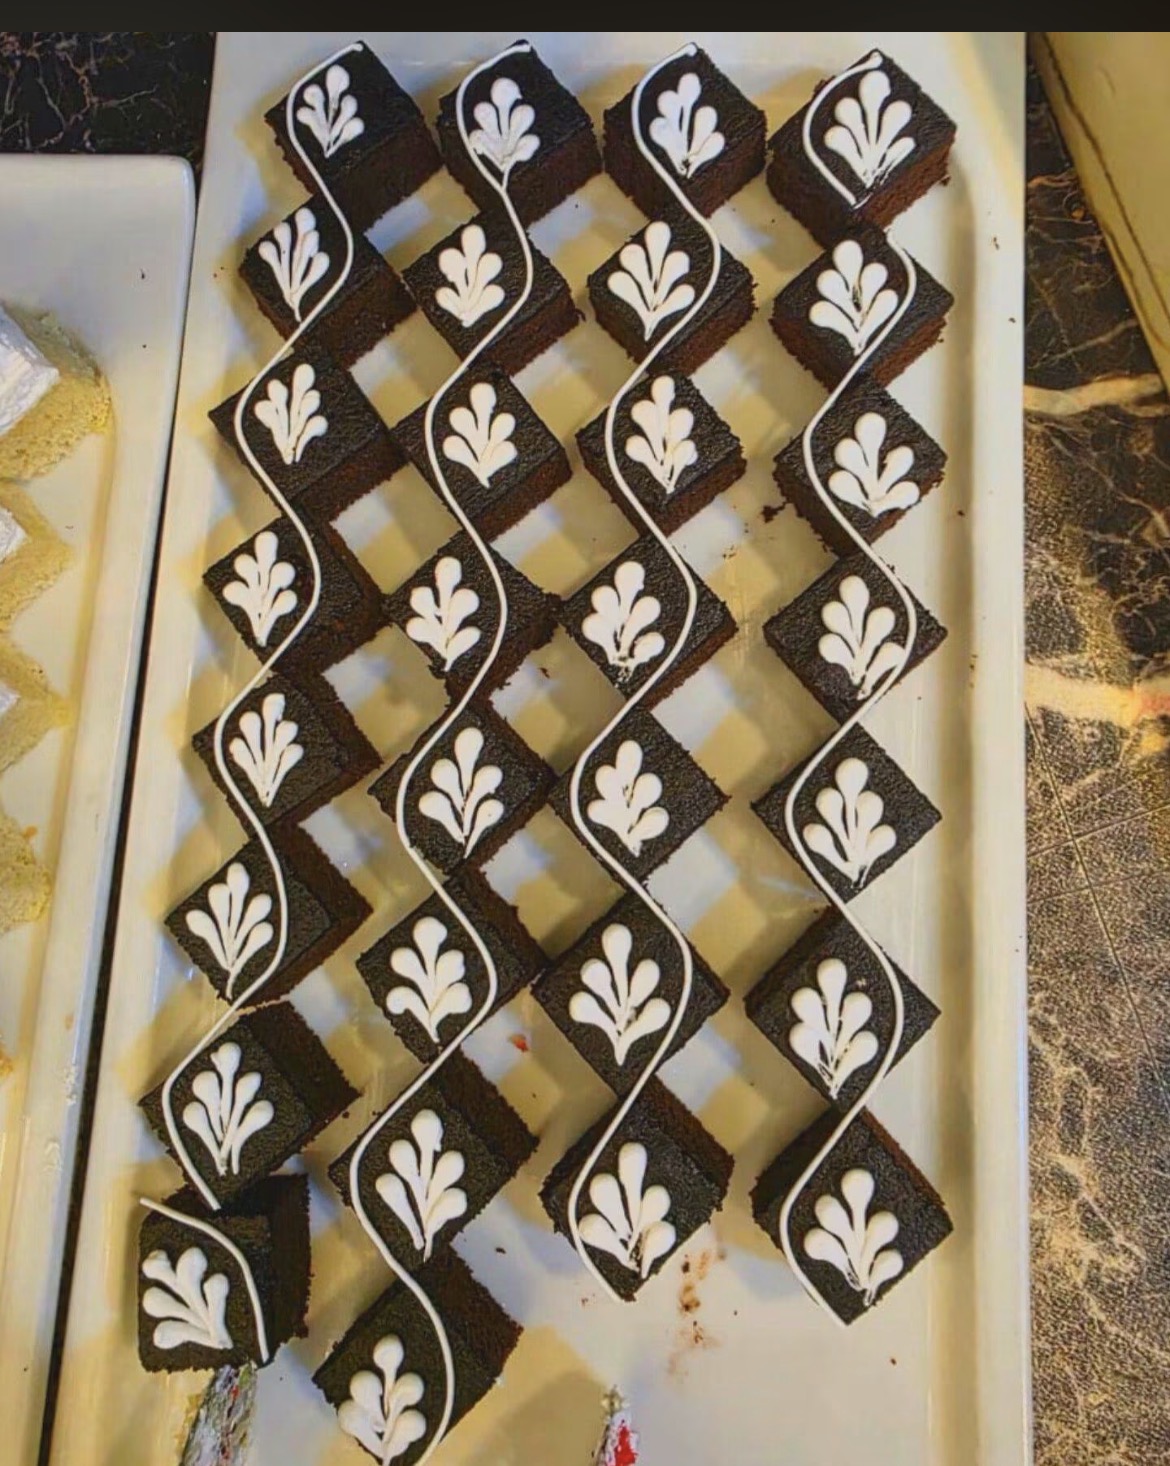
There is a simple elegance in desserts that look complex but are, in fact, surprisingly easy to assemble. The image above captures this perfectly—a platter of dense, fudgy dark chocolate brownies, arranged in a staggered grid, tied together visually by a continuous ribbon of white icing and topped with delicate, three-pronged floral motifs.
This dessert is a masterclass in presentation. While it looks like a high-end bakery display, the technique (often called piping in a specific pattern) is accessible to any home baker. The stark contrast between the deep, rich brown of the chocolate and the bright, crisp white of the cream cheese frosting creates a visually stunning and deliciously balanced bite.
The Secret to the Design
The “Fleur-de-Lis” (or simple three-leaf) pattern on top is achieved with a basic star tip. The true artistic element here isn’t just the individual brownies, but how they are served. By arranging them in a slightly overlapping checkerboard and piping the white icing to connect them, the individual squares become part of a larger, continuous design.
Full Recipe: Fudgy Dark Chocolate Brownie Bites
Yield: Approximately 20-24 small squares (for a standard 8×8 or 9×9 inch pan)
Prep Time: 20 minutes
Cook Time: 25-30 minutes
Difficulty: Easy (Intermediate for piping)
Ingredients
For the Brownies:
· 1/2 cup (113g) unsalted butter, cut into pieces
· 1 cup (175g) semi-sweet or dark chocolate chips (use high-quality for best flavor)
· 1 cup (200g) granulated sugar
· 2 large eggs, room temperature
· 1 teaspoon vanilla extract
· 1/2 cup (65g) all-purpose flour
· 1/4 cup (25g) unsweetened cocoa powder
· 1/4 teaspoon salt
For the Cream Cheese Frosting (The White Decoration):
· 4 oz (half a block) cream cheese, softened
· 2 tablespoons (28g) unsalted butter, softened
· 1 ½ cups (180g) powdered sugar (confectioners’ sugar)
· ½ teaspoon vanilla extract
· 1-2 teaspoons milk (only if needed for consistency)
Instructions
Step 1: Bake the Brownies
- Preheat & Prep: Preheat your oven to 350°F (175°C). Line an 8×8 or 9×9 inch square baking pan with parchment paper, leaving an overhang on two sides to lift out the baked brownies easily.
- Melt Chocolate: In a medium microwave-safe bowl, combine the butter and chocolate chips. Microwave in 30-second intervals, stirring after each, until completely melted and smooth. (Alternatively, melt over a double boiler).
- Mix Wet Ingredients: Whisk the sugar into the melted chocolate mixture until fully combined. Add the eggs one at a time, whisking vigorously after each addition until the batter is glossy and thick. Stir in the vanilla.
- Add Dry Ingredients: Sift in the flour, cocoa powder, and salt. Gently fold the dry ingredients into the wet mixture using a rubber spatula. Stop folding as soon as you no longer see streaks of flour (overmixing makes brownies cakey).
- Bake: Pour the batter into the prepared pan and smooth the top. Bake for 25–30 minutes. A toothpick inserted should come out with a few moist crumbs, not wet batter.
- Cool: Crucial step: Let the brownies cool completely in the pan on a wire rack. You must wait until they are at room temperature before frosting, or the icing will melt. For best results, chill them in the fridge for 20 minutes after they cool.
Step 2: Prepare the Frosting
- In a medium bowl, beat the softened cream cheese and butter together with an electric mixer until smooth and creamy.
- Gradually add the powdered sugar and vanilla extract, beating on low speed until combined, then increase to high speed until fluffy.
- If the frosting is too thick to pipe, add 1 teaspoon of milk at a time until it is a smooth, toothpaste-like consistency.
Step 3: Assembly & Piping (The Image Look)
- Cut the Brownies: Carefully lift the brownies out of the pan using the parchment paper. Place them on a cutting board. Using a sharp knife (wiping it clean between cuts), trim the edges for a cleaner look. Cut the center into even squares (about 1.5 x 1.5 inches or 2×2 inches).
- Prepare the Piping Bag: Fit a piping bag with a medium star tip (like Wilton 1M or 2D).
- The Design:
· Arrange your brownie squares on a large serving platter in staggered rows (as seen in the photo), leaving a tiny gap between them.
· For the wavy line: Pipe a continuous, wavy line of frosting horizontally across the middle of the brownie rows to connect them.
· For the leaf pattern (Fleur-de-Lis): On every single brownie, pipe a “V” or three-pronged “leaf” shape. To do this, squeeze a small dot at the top, pull the bag straight down for a short distance, release the pressure, and sweep the tip up to the left, then repeat sweeping it up to the right. This creates the classic three-pronged design seen in the photo.
Pro-Tips for Perfect Results:
· Don’t skip the chilling: If your brownies are warm, the butter in your frosting will melt and ruin the sharp white lines.
· Clean cuts: Dip your knife in hot water and wipe it dry between each cut. This gives you those crisp, professional-looking edges instead of smudged ones.
· Practice the piping: If you are new to piping, practice the three-leaf design on a piece of parchment paper first. The trick is to relax the pressure before you sweep the tip up