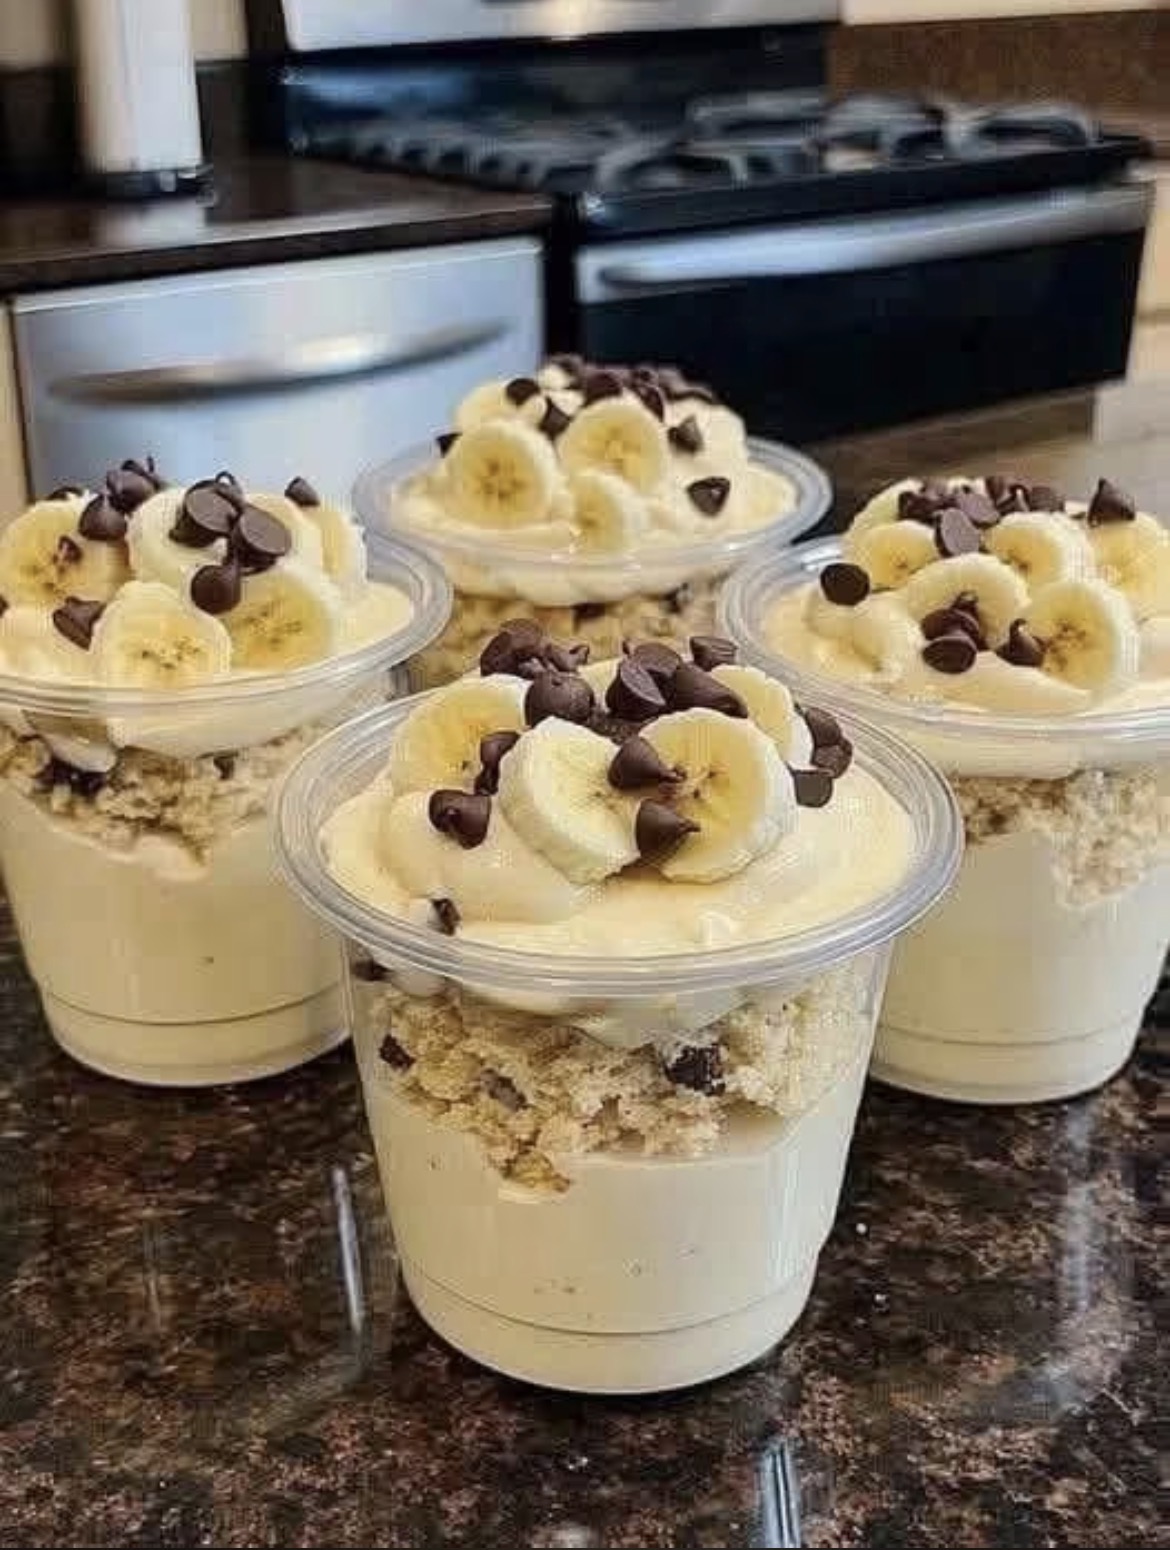
There is no dessert more comforting than a creamy banana pudding or pie. But let’s face it: baking a traditional pie crust, making custard from scratch, and waiting for it to set can take hours.
These Banana Cream Pie Cups are the perfect solution. They deliver all the rich, sweet, banana-y goodness of a classic pie, but with a quick, no-bake, single-serving twist. They are ideal for potlucks, meal prep, birthday parties, or simply when you are craving a sophisticated treat without the effort of a full pie.
What makes these cups special is the distinct textural contrast: a buttery cookie crumble, a silky smooth cream filling, and the juicy, fresh bite of banana on top, finished with crunchy chocolate chips. Plus, serving them in clear cups creates a stunning visual that makes the layers impossible to resist!
The Full Recipe
Prep Time: 20 minutes
Chill Time: 1 hour (minimum, ideally 2-4 hours)
Total Time: ~1.5 hours
Yield: 4 individual cups (using 8-10 oz clear plastic cups)
Ingredients
For the Cookie Crumble Base:
· 1 cup crushed vanilla wafers (Nilla Wafers) or graham cracker crumbs
· 3 tbsp melted butter (unsalted)
· 1 tbsp granulated sugar
For the Creamy Pudding Filling:
· 1 box (3.4 oz / ~96g) instant vanilla pudding mix
· 1 cup cold whole milk
· 8 oz (1 block) full-fat cream cheese, softened to room temperature
· 1/2 cup powdered sugar
· 1 tsp vanilla extract
· 1 ½ cups cold heavy whipping cream (divided: ½ cup for mixing, 1 cup for whipping)
For the Toppings:
· 2 medium ripe bananas, sliced into ¼-inch rounds
· ¼ cup semi-sweet chocolate chips (or mini chocolate chips)
Step-by-Step Instructions
Step 1: Make the Crumble Base
In a medium bowl, combine the crushed vanilla wafers and sugar. Drizzle with the melted butter and stir with a fork until the crumbs are evenly moistened and resemble wet sand. Spoon about 2 tablespoons of this mixture into the bottom of each of your four clear cups. Gently press it down with the back of a spoon to create an even base layer. Set the cups aside.
Step 2: Prepare the Pudding
In a small mixing bowl, whisk together the instant pudding mix and cold milk for about 2 minutes until it thickens. Place it in the refrigerator to set while you work on the rest.
Step 3: Whip the Cream
In a large mixing bowl, using a hand mixer or stand mixer with the whisk attachment, beat the 1 cup of heavy cream on medium-high speed until stiff peaks form. (This should take about 3-4 minutes). Be careful not to over-whip. Set this whipped cream aside.
Step 4: Make the Cream Cheese Mixture
In another large bowl, beat the softened cream cheese with a hand mixer until it is smooth and completely lump-free. Add the powdered sugar and vanilla extract, and beat until fully combined.
Step 5: Combine into a Silky Filling
Scrape the thickened pudding mix from the fridge into the cream cheese mixture. Mix on low speed until fully incorporated. Next, gently fold the reserved whipped cream into the pudding-cream cheese mixture using a spatula. Fold carefully until there are no white streaks left—this makes the filling incredibly light and airy.
Step 6: Assemble the Cups
Transfer the filling into a piping bag (or a large ziplock bag with the corner snipped off) to make filling the cups easier. Pipe a generous layer of the filling directly over the crumb base in each cup, filling them about 3/4 of the way full.
Step 7: Chill
Place the cups in the refrigerator for at least 1 hour (2-4 hours is best). Chilling allows the filling to firm up into a perfect, custard-like consistency.
Step 8: Garnish and Serve
Right before serving, take the cups out of the fridge. Arrange 3 to 4 banana slices on top of the cream in a slightly overlapping circle. Finish by scattering the chocolate chips over the bananas. Serve immediately and enjoy with a spoon!
Pro Tips & Substitutions
· Don’t slice bananas too early: Bananas brown quickly. Only slice them right before serving. If you want to prep ahead, you can brush the banana slices with a tiny bit of lemon juice to keep them from turning brown.
· Alternative Base: For a chocolate twist, use crushed Oreos instead of Nilla Wafers and omit the sugar in the base.
· Make it Gluten-Free: Use gluten-free graham crackers or vanilla cookies for the crumble.
· For Adults: Add a tablespoon of rum or bourbon to the cream cheese mixture for a “Banana Foster” flavor profile.
· Storing Leftovers: These are best eaten the day they are made. If you must store leftovers, cover the cups tightly with plastic wrap (press the wrap directly onto the filling) and eat within 24 hours, as the bananas will continue to soften and release juice into the cream.