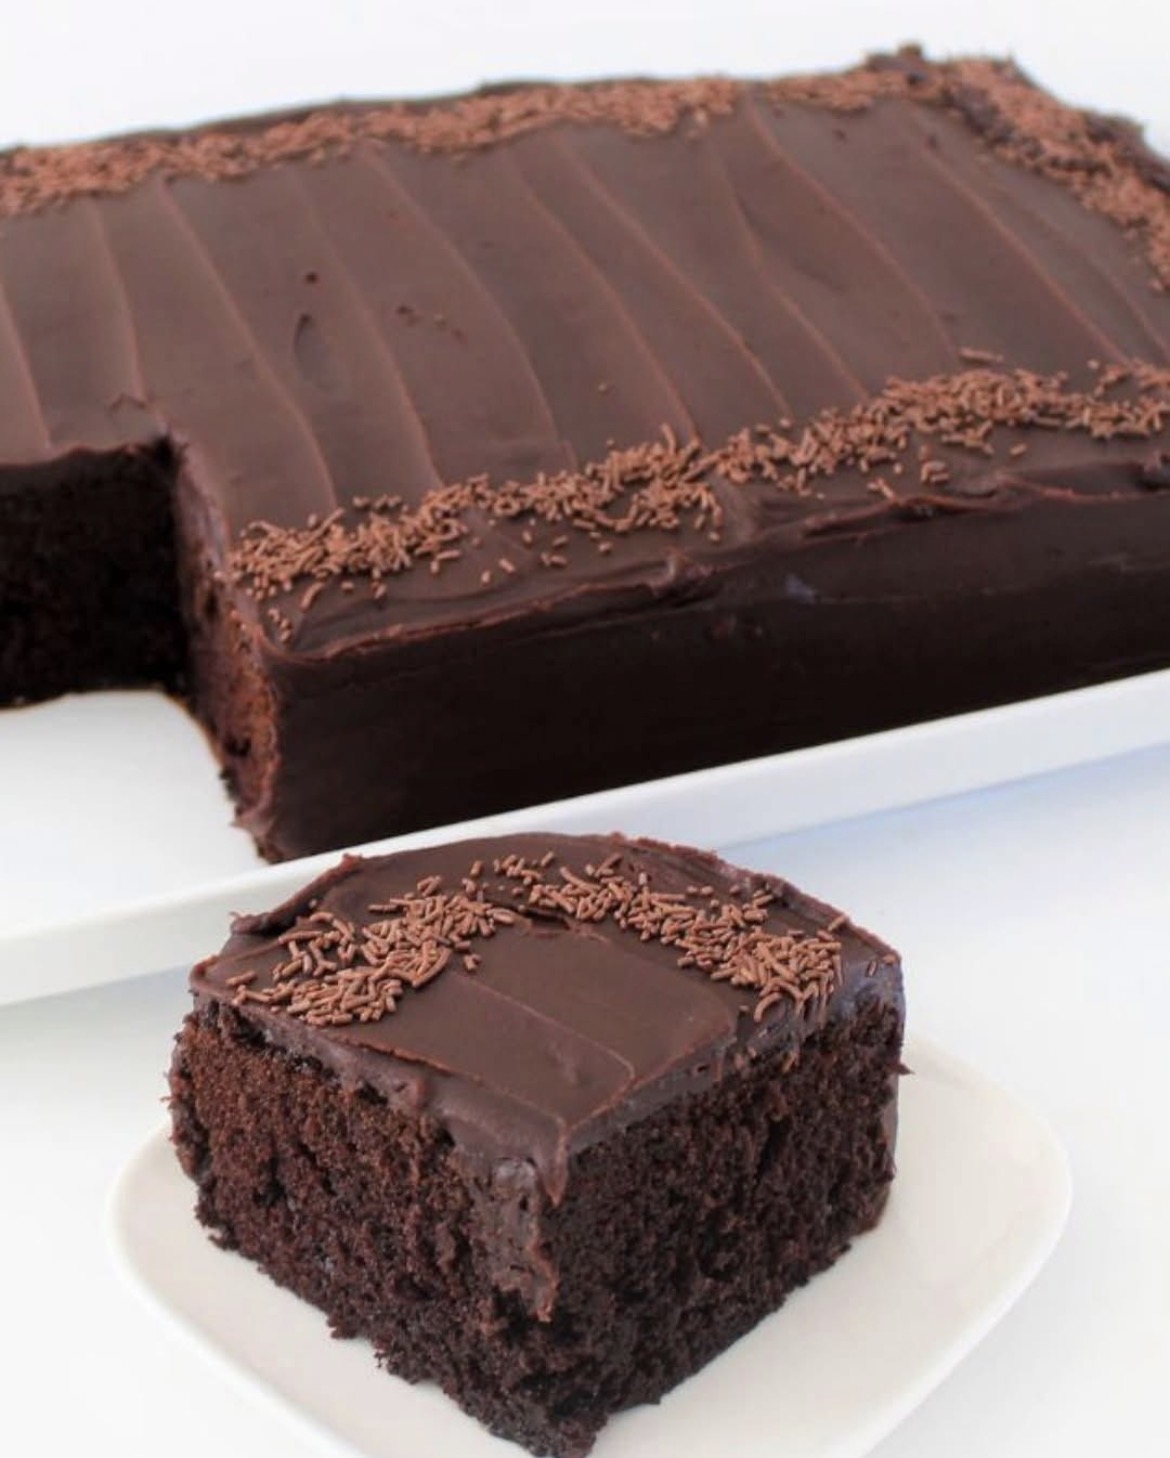
There are chocolate cakes, and then there are chocolate fudge cakes. The cake in this image isn’t just a dessert; it’s a statement. It features a deep, dark, moist crumb that feels almost decadent, topped with a layer of glossy, thick chocolate ganache that sets just enough to hold those beautiful, wavy knife marks. The final garnish of chocolate sprinkles adds a nostalgic, celebratory touch.
What makes this cake different from a standard sponge? The secret lies in the “reverse creaming” method (or the use of hot liquid), which melts the chocolate and cocoa powder to release their full flavor, creating a dense, almost brownie-like texture. The glaze isn’t a thin icing; it’s a rich ganache, made with cream and dark chocolate, poured over the top for that mirror-like shine.
Whether you are making this for a birthday, a holiday, or just because you need a serious chocolate fix, this recipe guarantees a show-stopping centerpiece.
Full Recipe: Dark Chocolate Fudge Sheet Cake
Yields: 1 large rectangular sheet cake (approx 9×13 inches) – serves 12-16
Prep Time: 25 minutes
Cook Time: 35–40 minutes
Ingredients
For the Cake:
· 1 ¾ cups (220g) all-purpose flour
· 2 cups (400g) granulated sugar
· ¾ cup (75g) unsweetened cocoa powder (Dutch-processed preferred for dark color)
· 2 teaspoons baking soda
· 1 teaspoon baking powder
· 1 teaspoon salt
· 2 large eggs, room temperature
· 1 cup (240ml) buttermilk, room temperature
· ½ cup (120ml) vegetable oil (or canola oil)
· 2 teaspoons vanilla extract
· 1 cup (240ml) hot brewed coffee (or hot water)*
For the Chocolate Fudge Ganache Glaze:
· 1 ½ cups (265g) semi-sweet chocolate chips or chopped dark chocolate (60-70% cacao)
· ¾ cup (180ml) heavy whipping cream
· Chocolate sprinkles (jimmies) for garnish
*(Note: The hot coffee does not make the cake taste like coffee; it intensifies the chocolate flavor and makes the cake incredibly moist.)
Instructions
Step 1: Prepare and Preheat
Preheat your oven to 350°F (175°C). Grease and flour a 9×13 inch rectangular baking pan, or line the bottom with parchment paper for easy removal.
Step 2: Mix the Dry Ingredients
In a large mixing bowl, whisk together the flour, sugar, cocoa powder, baking soda, baking powder, and salt. Make sure there are no lumps.
Step 3: Combine the Wet Ingredients
In a separate medium bowl, beat the eggs. Add the buttermilk, oil, and vanilla extract. Whisk until smooth and combined.
Step 4: Create the Batter
Pour the wet ingredients into the dry ingredients and mix using an electric mixer on medium speed for about 1 minute, until combined. Scrape down the sides of the bowl.
Carefully pour in the hot coffee. The batter will be very thin and liquid—this is correct! Continue mixing just until the batter is smooth.
Step 5: Bake
Pour the thin batter into your prepared pan. Bake for 35–40 minutes, or until a toothpick inserted into the center comes out with just a few moist crumbs (don’t overbake!).
Allow the cake to cool completely in the pan on a wire rack.
Step 6: Make the Ganache
While the cake cools, make the glaze. Place the chocolate chips in a medium heat-proof bowl. Heat the heavy cream in a small saucepan over medium heat until it just begins to simmer (bubbles form around the edges). Pour the hot cream over the chocolate. Let it sit for 2–3 minutes, then gently whisk until smooth and glossy.
Step 7: Glaze and Decorate
Note for the wavy look: Wait until the ganache cools and thickens slightly (about 15 minutes at room temperature). Pour the slightly thickened ganache over the cooled cake. Use an offset spatula to spread it to the edges, making those decorative wavy “sweeps” in the icing as shown in your photo.
Sprinkle generously with chocolate jimmies.
Step 8: Serve
Let the ganache set for about 30 minutes (or pop it in the fridge for 10 minutes) before cutting. Slice into squares, serve, and enjoy!
Pro Tip for the image-perfect slice: For clean cut squares, run a sharp knife under hot water, dry it, then slice the cake, wiping the blade between each cut.