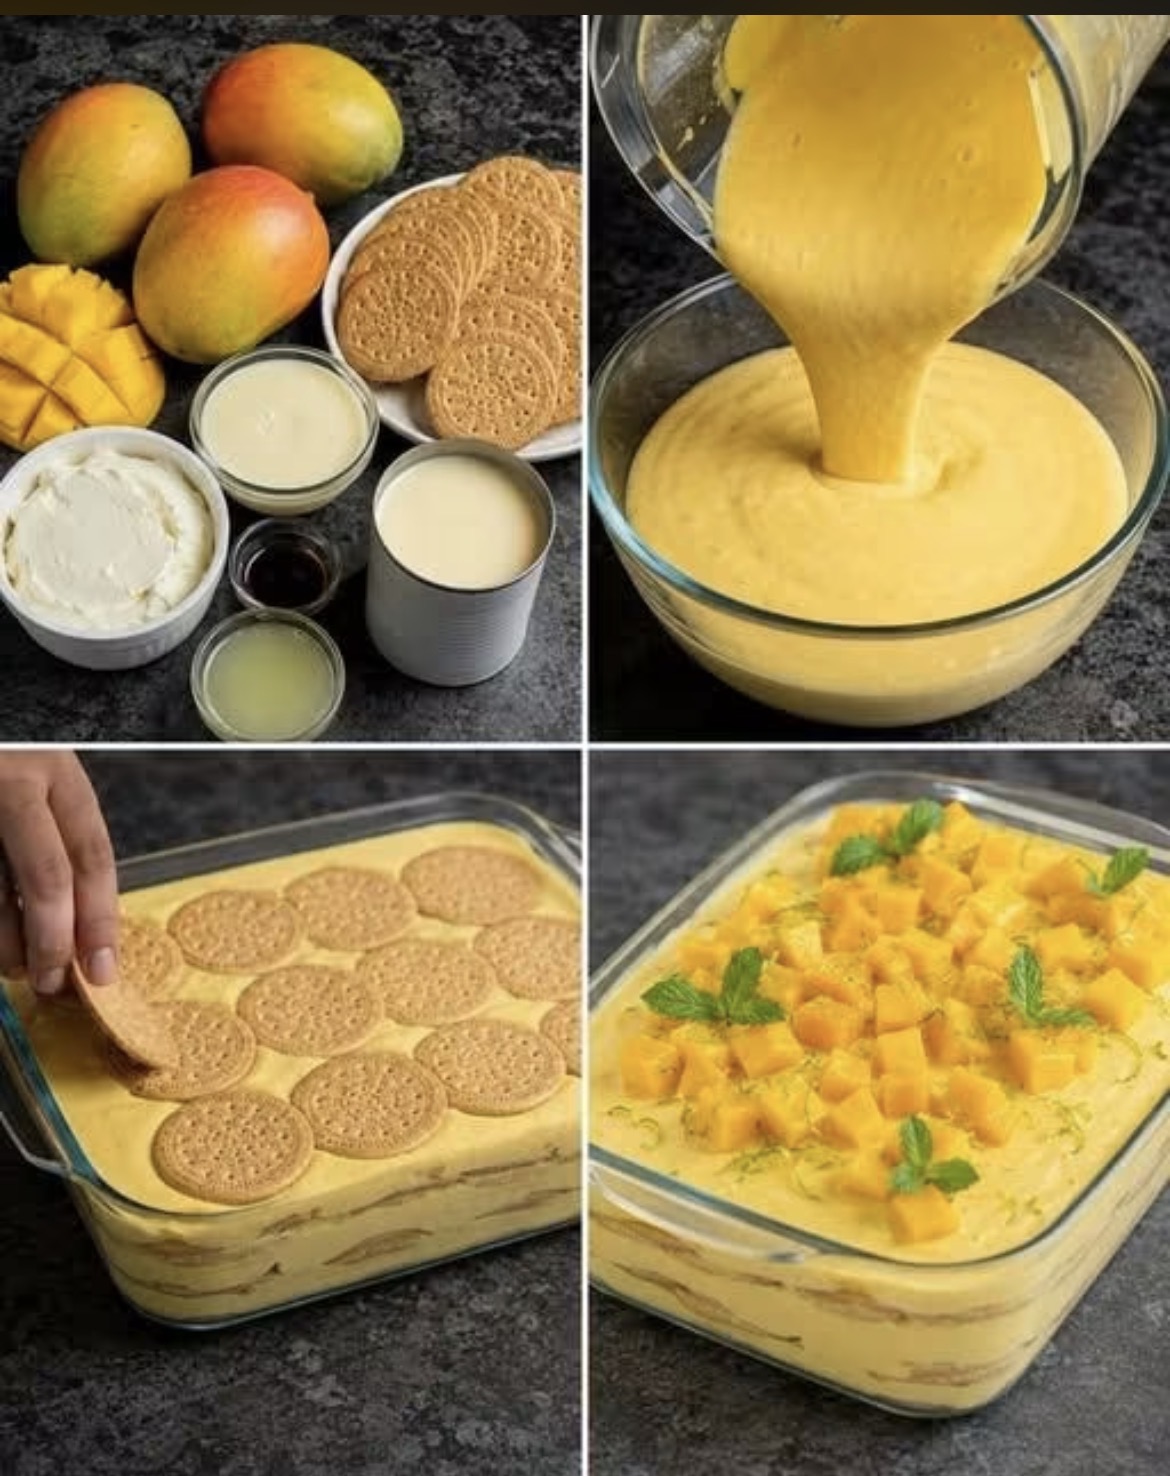
If you are looking for the perfect summer dessert that requires zero oven time, look no further. This No-Bake Mango Cream Cake is a tropical delight that looks incredibly impressive but is surprisingly simple to make.
As you can see from the photos, it relies on pantry staples: digestive biscuits (or graham crackers), sweetened condensed milk, cream cheese, heavy cream, and fresh mangoes. The magic happens in the fridge, where the layers soften and meld together into a creamy, sliceable cake.
Why you’ll love this recipe:
· No baking required: Perfect for hot weather.
· Bright, fresh flavor: Real mango puree gives it a vibrant taste.
· Textural perfection: Creamy filling + soft biscuit layers + juicy fruit chunks.
· Effortless elegance: It looks like you spent hours, but it comes together in about 20 minutes of hands-on time.
Full Recipe: No-Bake Mango Float / Layered Mango Cream Dessert
Prep Time: 20 minutes
Chill Time: 4+ hours (preferably overnight)
Servings: 8-10
Ingredients
For the Creamy Mango Mixture:
· 3 large, ripe mangoes (peeled, pitted, and roughly chopped)
· 1 can (14 oz / 400 ml) sweetened condensed milk
· 1 cup (8 oz) full-fat cream cheese, softened at room temperature
· 1 cup heavy whipping cream (cold, for whipping)
· 2 tablespoons fresh lemon or lime juice (pictured in the small bowl)
· 1 teaspoon vanilla extract
For the Layers & Assembly:
· 1 to 2 packs of plain digestive biscuits, Marie biscuits, or Graham crackers (pictured in the top left).
· 1 large mango (peeled and diced into small cubes, for the topping).
· 2-3 sprigs of fresh mint leaves (optional, for garnish).
Instructions (Step-by-Step based on the photos)
Step 1: Prepare the Mango Puree
· Take the roughly chopped mango flesh (from the 3 large mangoes) and place it into a blender. Blend until it is completely smooth. Set aside.
Step 2: Make the Cream Filling (Top Right Image)
· In a large bowl, beat the softened cream cheese with an electric mixer until smooth and fluffy.
· Add the sweetened condensed milk, vanilla extract, and lemon juice, and beat again until thoroughly combined.
· In a separate bowl, whip the cold heavy cream until stiff peaks form.
· Gently fold the whipped cream into the cream cheese mixture.
· Pour in your smooth mango puree and gently fold everything together until the mixture is a uniform, pale yellow color. (This is the “sauce” shown pouring in the top right photo).
Step 3: Assemble the Layers (Bottom Left Image)
· Get a 9×9 inch (or similar size) square or rectangular glass dish.
· First Layer: Pour a thin layer of the mango cream mixture into the bottom of the dish and spread it evenly.
· Second Layer: Arrange a single layer of the biscuits on top of the cream. Break a few biscuits if needed to fill the gaps (exactly as shown in the bottom left photo).
· Third Layer: Pour half of the remaining cream mixture over the biscuits and spread it out smoothly, making sure it covers all the biscuits.
· Fourth Layer: Arrange another layer of biscuits on top of the cream.
· Fifth Layer: Top with the remaining cream mixture and smooth the top surface completely.
Step 4: Chill and Set
· Cover the dish with plastic wrap or a lid.
· Refrigerate for at least 4 hours, but overnight is best. The biscuits need time to absorb the moisture from the cream and soften into a “cake” texture.
Step 5: Garnish and Serve (Bottom Right Image)
· Before serving, take your final mango and cut it into small, uniform cubes.
· Scatter the diced mango cubes evenly over the top of the set dessert.
· Tuck fresh mint leaves into the mango pieces for a pop of green color and freshness.
· Slice and serve chilled.
Chef’s Tips
· The Mangoes: For the best flavor, use ripe, sweet, aromatic mangoes (like Ataulfo or Kent). If the mangoes are tart, you can add an extra 2 tablespoons of sugar to the filling.
· The Biscuits: Don’t over-soak the biscuits—they will soften perfectly in the fridge.
· Shortcut: Use store-bought mango pulp instead of blending fresh mangoes to save time, though fresh tastes better.